|
|
| [ TechGuys ] | [ Forum ] | Changing engine oil | [ Projects ] | [ How To ] | [ Email ] | [ Links ] |
Every shade-tree mechanic has their starting point, and where better to start than an oil change? Your first oil change should give you some degree of familiarization with your car's drive-train components. Performing your own oil changes can be beneficial on so many levels: you become more familiar with your car, you save lots of money, and you will have a much better idea of the vehicle's condition.
| Tools / Resources: | Consumables: |
|
|
There are a few safety notes which should be covered before we illustrate a typical engine oil change:
- hot engine oil can severely burn you
- used engine oil has been found to cause cancer with prolonged exposure
A few administrative / technical notes which should also be noted:
- oil will deteriorate most driveway surfaces
- disposing of oil through land fills is illegal - you should find an authorized oil disposal centre (such as most Speedy tm locations).
- you should match your oil to the season (ie. 10w30 for summer and 5w30 for winter)
| First step will be to drive to the nearest car parts store
to procure the appropriate engine oil + filter for your car. Please
refer to your manual for the recommended oil. Generally, it is as
follows: 10w30 for summer, 5w30 for winter. Drive your car until it reaches its "normal operating" temperature [ie. drive it for at least 20 minutes]. This should be accomplished as you drive to your favourite car parts store. |
[click for larger image] figure 1 |
|
[click for larger image] figure 2 |
Once you have warmed up the engine, head back home and lay
down a plastic sheet where the car will be jacked up. The plastic
sheet will protect the work surface as well as the environment against any
oil spills. Once in position, jack up the vehicle or use appropriate ramps to raise the front end of the vehicle. Ramps are a quick, and generally safe alternative to jacking up your vehicle - you may consider purchasing a set of ramps just for oil changes. If you purchase a set of ramps, we recommend you buy ramps made of specially treated rubber - they are very solid and will not gouge your driveway as most metal ramps will. |
| Now you must find the engine oil drain plug. This is
generally found on the bottom of the engine, in the lowest possible
position .. generally facing towards the rear wheels. Once you have found the drain plug, position your oil catch pan under the drain plug. As a last minute note, make sure your container is large enough to contain all of the engine oil about to be released. Check your manual for "crank case" or "engine oil" capacity. |
[click for larger image] figure 3 |
|
[click for larger image] figure 4 |
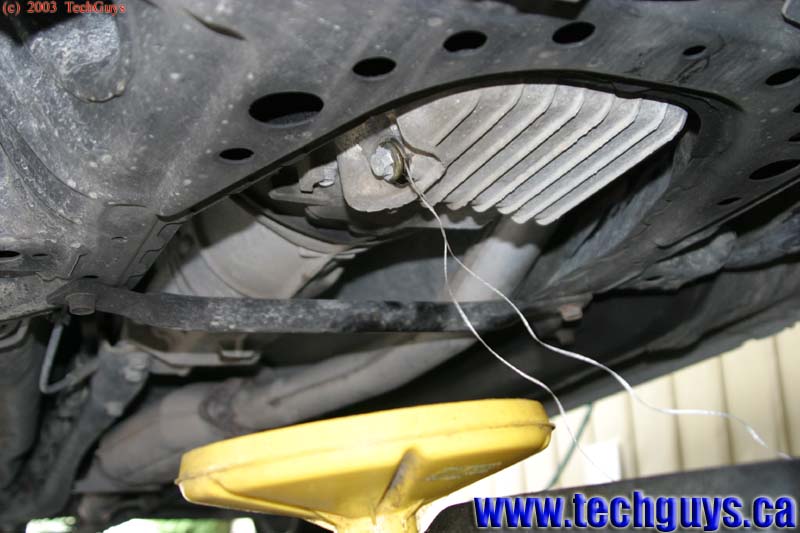
Don your vinyl gloves at this point and loosen the drain
plug with your wrench or ratchet set. As a tip, if your catch pan
does not have some form of "filter" to prevent the drain plug from falling
into a tub of hot engine oil, tie a piece of dental floss around the drain
plug bolt. The dental floss trick can save you from a major headache! [begin sarcasm] Nothing is more fun than losing the outer layer of skin on both hands while trying to recover your drain plug. [end sarcasm] |
| Once you are ready, remove the drain plug completely.
Extremely hot engine oil will begin to leak out of the engine so be ready! Once the drain pan is in proper position and catching oil, remove the "oil cap" on the top of the engine to expedite the draining process. Be sure you know where the "oil cap" is on your engine before draining the engine oil. |
[click for larger image] figure 5 |
|
[click for larger image] figure 6 |
Let the engine oil drain for 20 to 30 minutes if possible.
You can continue to the next step whenever you feel you have allowed
enough oil to drain, though do not rush the process too much. During this process, you should measure out the appropriate amount of engine oil to re-fill the crank case. Pour the measured amount into your oil pitcher. Factory spec. for a Mazda MX-5 Miata is:
|
| Once the new engine oil has been measured out, be sure to
"prime" the new oil filter by filling it with fresh engine oil and
allowing it to sit for a few minutes. Repeat the process once more
and pour out any un-absorbed oil back into the clean oil container. This process is to both protect the new filter from tearing due to sudden oil pressure on a "dry" medium, and to provide the engine with some oil upon starting up. |
[click for larger image] figure 7 |
|
[click for larger image] figure 8 |
With the remaining clean engine oil, flush the engine of
as much dirty oil as possible. Do this by pouring the clean oil into
the engine from the "fill cap". Use a funnel to prevent spillage. Once again, let the engine sit for a few minutes to allow the oil to escape the engine. Now is a good time to locate your oil filter if you are unfamiliar with its location. Occasionally, it is beneficial to purchase a crank case flush kit from your parts store to remove any gummy deposits of oil from the engine. Be sure you follow the manufacturer directions should you buy such a kit. |
| Next step will be to remove the old engine oil filter.
Be cautious during this stage - you may burn your arms on hot engine
components when trying to release the oil filter. Also ensure that the oil filter does not tip over - avoid spilling any oil as much as possible. Some oil will inevitably leak, so be prepared with a few rags. When you are ready, remove the oil filter by turning it counter-clockwise. If required, use an oil filter wrench to loosen the old oil filter. |
[click for larger image] figure 9 |
|
[click for larger image] figure 10 |
Once the old oil filter is removed, clean the oil filter
mounting flange + threads with a clean rag. This is to ensure you do
not damage the threaded boss on the engine - pain in the butt to repair. Next, oil the rubber o-ring on the new oil filter with some clean engine oil. Now install the new oil filter using only your hands. Once the filter is fully seated on the engine, ensure that the filter is on fairly tight - once again only using your hands. |
| Next, re-install the oil drain plug .. be sure to use a
new crush washer on the drain plug bolt if there was one there to begin
with. The drain bolt should generally be "torqued" down to factory spec. If you are not sure what the torque spec. is, make it snug, but do not over-tighten! The factory torque spec. for a Mazda MX-5 Miata is: { 30-41 N/m \ 3.0-4.2 kg/m \ 22-30 lb/ft } |
[click for larger image] figure 11 |
|
[click for larger image] figure 12 |
At this stage, you are ready to re-fill the engine with fresh engine oil. Be sure to only pour a measured amount into the engine - over filling can be bad for your engine .. though do not worry if you only over fill by a small margin. |
| Be sure to check the oil level using the dip-stick. Add oil until you reach the "full" mark. Check the dip-stick often through out the filling process to be absolutely sure you have filled the crank case to the proper amount. |
[click for larger image] figure 13 |
|
[click for larger image] figure 14 |
Once topped up, be sure to replace the oil fill cap.
If you don't, engine oil will bathe your engine's exterior next time you
drive it hard - just ask Shaun (he was the victim of a "quick-oil-change"
place once). Next, check the dip-stick to ensure you have filled the
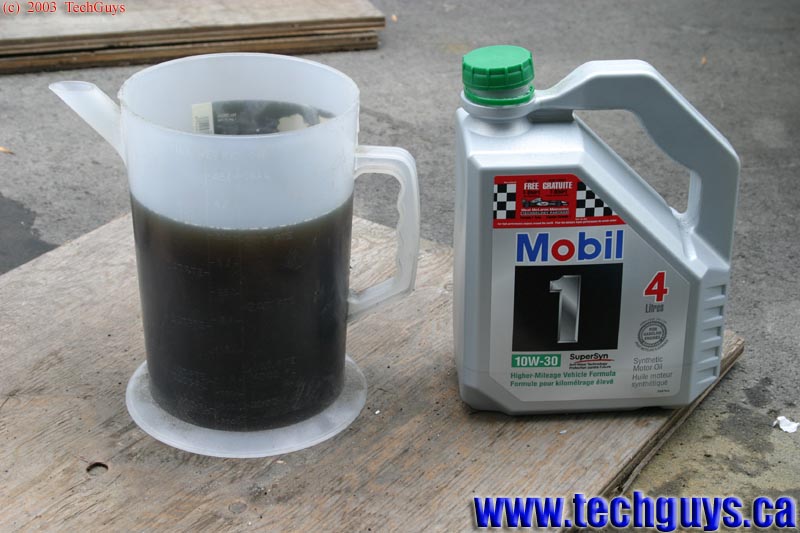
engine with the appropriate amount of engine oil. Next, pour the used engine oil into the newly emptied container. Be sure to clean up any mess you might have made - a hint: cat litter or sawdust is great for soaking up oil spills - just be sure to properly dispose of the absorbed oil! |
|
Clean up your work area, jack down the vehicle and drive
to the nearest oil disposal location. You're done! You just
saved $20 or more and you are beginning to better understand your car. As a precaution, for the following few days, place a piece of cardboard under your car when you park on your driveway. The cardboard will catch any oil that you might have missed during the clean up process - if you see more than a few small oil patches on the cardboard, check for an oil leak at either the drain plug, or the oil filter. |
|
|
If you feel that this article has been of any use to you, please consider
supporting the website by making a small donation.
For more info, simply click on the "Make a Donation" icon and you will be brought to a donation info page. Thanks! |
| [ TechGuys ] | [ Forum ] | Changing engine oil | [ Projects ] | [ How To ] | [ Email ] | [ Links ] |
(c) Copyright 2019 - James Buck - www.techguys.ca